If an Android emulator, virtual machine, or certain gaming software refuses to start and mentions “virtualization,” the fix is almost always the same: you need to enable VT-x in BIOS. This one setting is disabled by default on a lot of laptops, and finding it can be confusing since every manufacturer hides it in a slightly different menu. This guide walks through the exact path, on both Intel and AMD systems, so you’re not clicking through BIOS screens blindly.
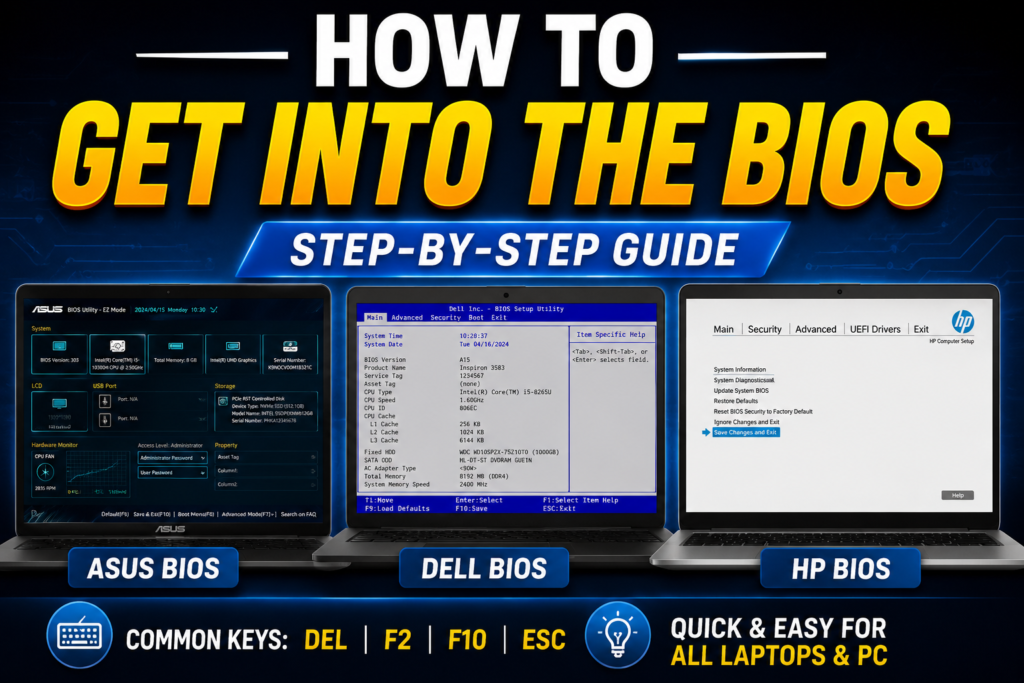
Step 1: Get Into the BIOS
How you enter BIOS depends on your laptop or PC brand, since there’s no single universal key:
- HP laptops: usually F10, sometimes Esc then F10
- Dell laptops: usually F2
- Lenovo laptops: usually F1 or F2, sometimes Novo button
- Acer/Asus laptops: usually F2 or Del
- Desktop PCs: usually Del or F2 right after powering on
Restart your PC and repeatedly tap the key for your brand as soon as it powers on, before Windows starts loading. Some newer laptops also have a small physical button near the power button that opens a recovery/boot menu — from there, select BIOS Setup instead of Windows normal startup.
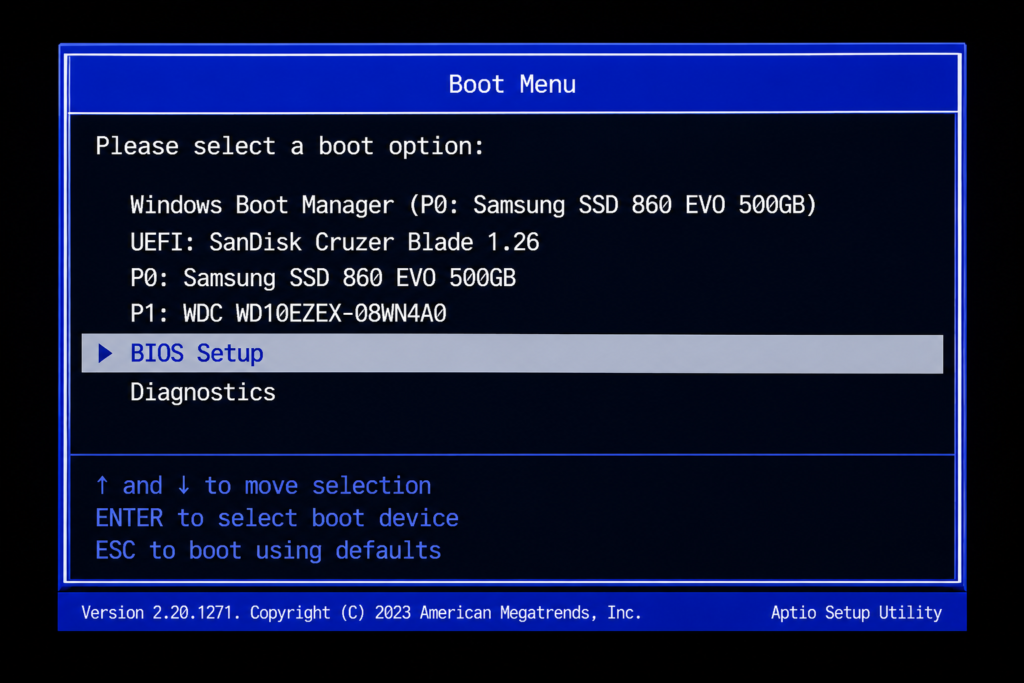
Step 2: Find the Virtualization Setting
Once inside BIOS, look for a tab called Configuration, Advanced, or CPU Configuration (the exact name varies by manufacturer). Inside that menu, you’re looking for one of these two settings depending on your processor:
- Intel processors: “Intel Virtualization Technology” or “Intel VT-x”
- AMD processors: “SVM Mode” (AMD’s equivalent of VT-x)
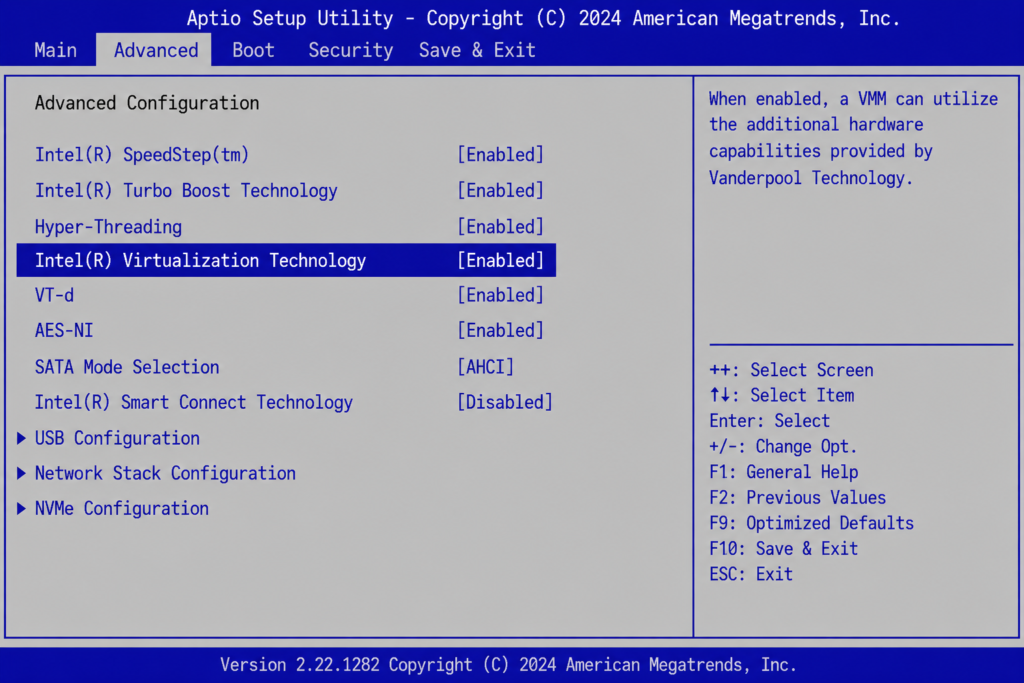
Step 3: Enable It and Save
Select the virtualization option and change it from Disabled to Enabled — usually with the Enter key or arrow keys, depending on your BIOS layout. Once it’s enabled, press F10 to save changes and exit. Your PC will restart automatically with the new setting applied.
What to Expect After Enabling VT-x
Once virtualization is enabled, Android emulators (like BlueStacks or NoxPlayer), Hyper-V, VirtualBox, and VMware should start without the “virtualization not enabled” error. No restart of Windows itself beyond the automatic BIOS restart is needed — the setting takes effect immediately.
One thing to check if the option is greyed out or missing entirely: some laptop manufacturers lock this setting on certain models, or it may be hidden under a slightly different sub-menu than described here. In that case, check your exact laptop model’s manual on the manufacturer’s official support site rather than guessing further in BIOS.
Compatible Devices
- Any Windows 7, 10, or 11 laptop or desktop with an Intel processor supporting VT-x
- Any AMD-based system supporting AMD-V/SVM
- HP, Dell, Lenovo, Acer, and Asus laptops (menu names vary slightly, steps are the same)
Watch the Full Video Walkthrough
If You’re Setting Up for Emulators or Virtual Machines
1. RAM Upgrade Kit (8GB or 16GB)
Emulators and virtual machines are RAM-hungry. If you’re running one alongside your normal apps, more RAM makes a noticeable difference.
2. External SSD
Running a virtual machine’s disk image off an SSD instead of an HDD dramatically improves how responsive the VM feels.
3. Laptop Cooling Pad
Virtualization workloads push your CPU harder than normal use. A cooling pad helps maintain performance during longer emulator or VM sessions.
Frequently Asked Questions
How do I enable VT in BIOS?
Enter BIOS using your laptop brand’s key (commonly F2, F10, or Del), go to the Configuration or Advanced tab, find Intel Virtualization Technology (or SVM Mode on AMD), set it to Enabled, then press F10 to save and exit.
How to enable VT in Windows 7 Ultimate?
The setting lives in BIOS, not in Windows itself, so the steps are identical regardless of whether you’re running Windows 7, 10, or 11. Restart, enter BIOS, and enable virtualization from the Configuration menu.
Virtualization technology kaise enable karein?
BIOS mein jaayein (restart karte waqt F2, F10, ya Del dabayein — laptop brand ke hisaab se), Configuration tab kholen, aur ‘Intel Virtualization Technology’ ko Enabled par set karein. Aakhir mein F10 dabakar save karein.
Why is virtualization technology greyed out in BIOS?
This usually means either a BIOS password/admin lock is restricting changes, or the manufacturer has restricted it on that specific model. Check your laptop’s official support page for model-specific guidance rather than trying random workarounds.
Do I need to enable VT-x for BlueStacks or Android emulators?
Yes — most modern Android emulators require VT-x (or AMD-V) to run properly and will show an error or run very slowly without it.
Is enabling virtualization safe?
Yes, it’s a standard hardware feature meant to be used and doesn’t affect your system’s security when enabled. It’s required for many legitimate tools like virtual machines and emulators.
What’s the difference between Intel VT-x and AMD SVM?
They’re the equivalent virtualization feature for their respective processor brands — VT-x for Intel, SVM (or AMD-V) for AMD. You only need to enable the one matching your processor.
TapsVision-