If your laptop has an Intel Core i3 7th Generation processor and Windows 11 shows your PC as “unsupported,” you’re not alone — this is one of the most common questions from HP, Dell, and Lenovo laptop owners still running older hardware. This exact setup (i3 7th Gen, HP laptop, 4GB RAM) has been tested and installed with Windows 11 successfully, and this guide walks through the process, the results, and whether it’s actually worth doing on your machine.
What You’ll Need Before You Start
- A laptop with Intel i3 7th Gen (or similar 6th/7th Gen Intel) processor
- At least 4GB RAM (8GB recommended for smoother multitasking)
- At least 64GB of free storage — SSD strongly recommended over HDD
- A genuine Windows 10 or Windows 11 ISO from Microsoft’s official site
- A USB drive (8GB+) if doing a clean install
- Backup of your important files before making any changes
A quick but important note: officially, Microsoft requires TPM 2.0, Secure Boot, and a supported 8th-Gen-or-newer processor for Windows 11. An i3 7th Gen chip does not meet this requirement on paper. That said, many 7th Gen laptops — including budget HP models — already have TPM 2.0 hardware and Secure Boot built in; they’re simply blocked by Microsoft’s compatibility check, not by an actual hardware limitation.
Step-by-Step: Installing Windows 11 on an Unsupported i3 7th Gen Laptop
Step 1: Check Your Current Specs
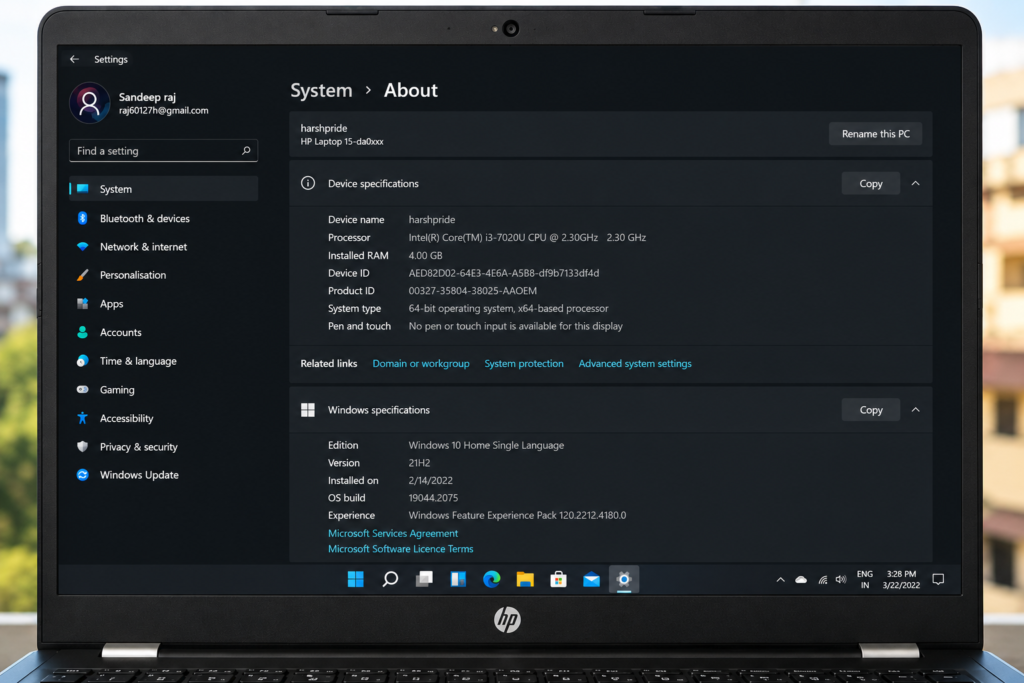
Before doing anything, check your processor generation, RAM, and available storage. Go to Settings > System > About on Windows 10 to confirm your exact processor model (for example, Intel Core i3-7100U or i3-7020U) and current RAM.
Step 2: Check TPM and Secure Boot Status
Type tpm.msc into the Windows search bar and press Enter. If it shows TPM 2.0 is present and ready, your laptop’s hardware already supports one of Windows 11’s core requirements — the compatibility block is coming from the processor generation check, not missing hardware.
Step 3: Enable Secure Boot in BIOS (If Not Already On)
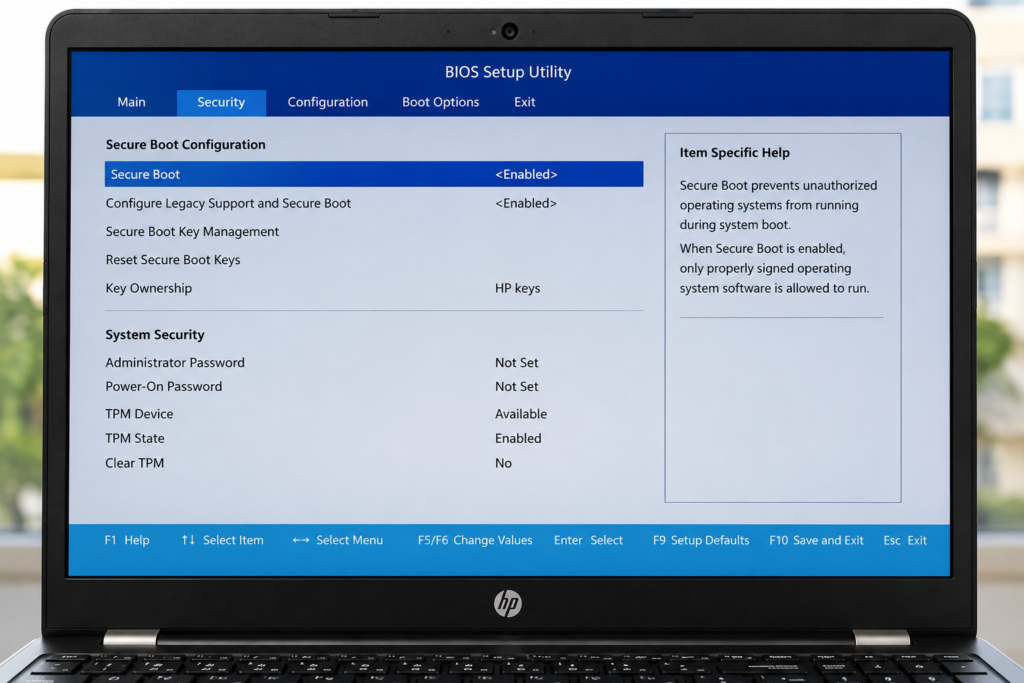
Restart your laptop and enter BIOS setup (usually F10 or F2 on HP laptops during boot). Look for Secure Boot under the Security or Boot tab and set it to Enabled. Save changes and exit.
Step 4: Bypass the Compatibility Check
Since the i3 7th Gen isn’t on Microsoft’s official supported-CPU list, the standard Windows 11 installer will block the upgrade with an “unsupported processor” message. To get around this, you’ll need to bypass the compatibility check during setup rather than relying on Windows Update. Search for Microsoft’s own documentation on installing Windows 11 on ineligible PCs, or use a trusted, well-reviewed community registry-edit method — avoid downloading random third-party “bypass tools” from unverified sites, since these are a common source of malware.
Step 5: Install and Update
Once the installer accepts your hardware, proceed with the install as usual. After installation, immediately check for Windows Updates — a fresh install often needs two or three update cycles before it’s fully current. This step matters: skipping updates is a common reason people report bugs afterward.
After the Fix: What to Expect
On a real HP laptop with an i3 7th Gen processor, 4GB RAM, and an SSD, Windows 11 ran smoothly for everyday tasks — browsing, YouTube playback, and light multitasking between apps like Calculator and Microsoft Store. The interface felt noticeably different from Windows 10, with animations and a layout that feel closer to Android or Chrome OS. No visible lag or freezing was reported during normal use.
One important caveat: if your laptop’s chipset does not support TPM 2.0 or Secure Boot at all (not just blocked, but genuinely absent), you will not receive Windows Updates after installing this way. In that case, it’s better to stay on Windows 10 rather than run an update-less Windows 11 install.
Compatible Devices
This method has been shown to work on:
- HP laptops with Intel Core i3 7th Gen (i3-7100U, i3-7020U, and similar)
- Other 6th and 7th Gen Intel Core i3/i5/i7 laptops from Dell, Lenovo, and Asus with TPM 2.0 present
- Laptops with 4GB RAM (8GB or more strongly recommended for a better experience)
- Systems with SSD storage — HDD-only systems will feel noticeably slower
Watch the Full Video Walkthrough
Recommended Upgrades for a Smoother Windows 11 Experience
If you’re running Windows 11 on older hardware like an i3 7th Gen, these upgrades make the biggest real-world difference:
1. SanDisk / Crucial SATA SSD (240GB–480GB)
If your laptop still has a hard drive, switching to an SSD is the single biggest speed upgrade you can make — often more impactful than a RAM upgrade.
2. Crucial / Kingston DDR4 RAM (8GB Stick)
Most 7th Gen laptops support a RAM upgrade to 8GB or 16GB. This noticeably improves multitasking on Windows 11, which is heavier than Windows 10.
3. Laptop Cooling Pad
Older laptops running a newer OS tend to run warmer under load. A basic cooling pad helps maintain performance during longer sessions.
Frequently Asked Questions
Can I install Windows 11 on an i3 7th Gen laptop?
Yes. While Intel i3 7th Gen isn’t on Microsoft’s official supported list, most of these laptops already have TPM 2.0 and Secure Boot hardware. Bypassing the compatibility check during setup allows installation, as shown in this guide.
Windows 11 kaise download karen agar processor unsupported dikhaye?
Agar aapka processor unsupported dikha raha hai, to aapko installer ke compatibility check ko bypass karna hoga. Pehle TPM aur Secure Boot check karein (tpm.msc), phir Microsoft ki official ineligible-PC install process follow karein.
Will Windows 11 work well with only 4GB RAM?
It will run, but 4GB is the bare minimum. Basic browsing, YouTube, and light apps work fine, but heavier multitasking will feel slow. An 8GB RAM upgrade makes a noticeable difference.
Is it safe to bypass the Windows 11 unsupported CPU check?
It’s reasonably safe if your hardware actually has TPM 2.0 and Secure Boot support and you use Microsoft’s own documented method. The main risk is losing future update eligibility if your hardware truly lacks TPM/Secure Boot, or downloading bypass tools from untrusted sources.
Will I still get Windows updates after bypassing the check?
If your laptop’s TPM and Secure Boot hardware genuinely meet the minimum requirements, updates typically continue to arrive normally. If the hardware is truly absent, Microsoft may withhold future feature updates.
Is Windows 11 worth installing on an old i3 7th Gen laptop?
If your laptop has an SSD and at least 4GB RAM, it’s worth trying — you can always roll back to Windows 10 within 10 days if you’re not satisfied. On HDD-only or 2GB RAM systems, it’s better to stay on Windows 10.
How to install Windows 11 in HP laptop with i3 7th Gen?
Check your specs, confirm TPM 2.0 status, enable Secure Boot in BIOS, bypass the compatibility check using Microsoft’s documented method for ineligible PCs, then install and run Windows Update immediately afterward.
Windows 10 vs Windows 11 — which is better for old laptops?
Windows 10 is generally lighter and more stable on older, low-RAM hardware. Windows 11 offers a modern interface and longer future support, but needs slightly more resources to feel smooth.
TapsVision-